
Hello wyverns and hunters!
Here comes the sixth part of my massive Monster Hunter cosplay build project – I'm making a Hunting Horn called Eldaora's Taus from Monster Hunter 4 Ultimate, one of my most played video games to date.
I've been a big fan of the franchise ever since I played Freedom Unite and making a costume from the series has been a dream of mine for many years and now it's happening!
I am currently only making the weapon but I will make a complete armor
set later to go with it, of course. I'm not doing naked runs. *insert Khezu screams here*
You have no idea what I've made before I got to this point in the progress? No worries, all the previous parts of this project can be found here: 1, 2, 3, 4, 5
Note: this project is split into several parts because otherwise it would turn into a kilometer post; I need to document my progress carefully (many photos etc) since it's a school project.
Let the quest begin!
 |
| Hunting Horn spray primed. |
During my last progress I ended the post with the gluing episode incomplete and that's because I ran out of glue. My mom had bought new glue during a trip afterwards – it was just an ordinary white wood glue but it did the job. I completed gluing the surface for protection and after that I finally got to the fun stuff – prepare for painting!
Above you can see the start of my priming process. I used spray primer because it's quicker and easier when it comes to covering such a big object. Sadly it didn't take long before I ran out of my primer cans and had to go buy more. A lot more.
I was in a hurry to prime the whole thing during mid-October because the weather was unpredictable and the sky constantly looked like it might rain any minute, but according to the forecast it shouldn't. For once I didn't have shit luck and the weather stayed rain-free for the whole day that I was spraying.
Note: I have to take some risks with the weather because I'm running out of time – as soon as it gets cold outside I can't spray paint anymore and that would be a huge problem since I need to finish this project before Christmas. And yes, I live high up in the north so cold weather is guaranteed and often early...
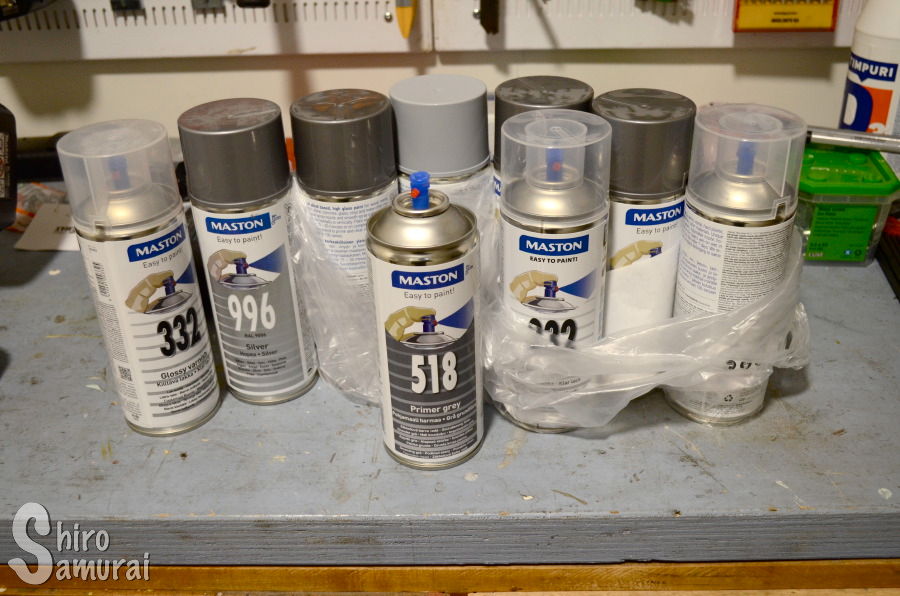 |
| Just a couple cans... |
On the photo above all the cans inside the plastic bags were newly bought (and the one with the lid off) and the ones without plastic I had from previous projects. I'm hoping these will be enough. There's also of course the empty primer cans that are not pictured. On the photo there's silver spray paint, gray primer and glossy clear varnish for finishing.
I turned the Hunting Horn around and primed the other side as well. After that I took it back inside the garage to dry overnight.
The next morning I went back to the garage to take a look. Meanwhile I stared at my progress I started considering using worbla to make the eyes more three-dimensional by making "eyeballs" that I'd sink into the carved eye holes. Soon enough I made that idea happen and took out the heat gun and some worbla scrap pieces that I had saved in a plastic bag. For those not in the know worbla is a heat-activated thermoplastic widely used by costumers to create a wide variety of items.
I molded the worbla scraps first into a ball and then into a "caterpillar shape", once done I reheated the worbla and pressed it into the eye holes to let it cool down. Repeat for the other eye.
 |
| Eyes accented with worbla. |
When I was done with both eyeballs I noticed that the eyes were in a different angle (it became even more obvious after attaching the eyeballs!) and it looked really stupid. That's when I figured that I could save my Horn from looking retarded if I redefined the "brow ridges" to be more similar to one another. I took some more worbla scraps, molded them together and made even longer caterpillars with my fingers and then pressed them in place. It was really hard to get both sides to be symmetrical and honestly, they aren't. But it's a lot better than before and the accented ridges gave the face more definition anyway, which looks cooler.
I couldn't be bothered to start sanding the worbla smoother since the rest of the surface isn't smooth anyway (I'm gonna make it look battle-worn!) and thus I went out to spray paint the whole shebang silver. Again the weather was moist and not ideal but at least it didn't rain this time either and I got done in time.
 |
| Silver spray paint in progress. First coat. |
I did two coatings of silver spray paint and then carried the Horn back inside, into safety from the weather. It was during this point that I realized that I had forgotten to add the little outwards-facing pointy mane spike at the top of the "hair bananas" but, frankly, the more I thought about it the more I felt like omitting that small detail was the best choice anyway. It would surely break easily and, seeing how it would face a different direction than the rest of the manes, it would make it really hard (if not impossible) to rotate the thing around and I'd rather not make it even harder to handle and for future storage than what it will be already...
Honestly, I'm sort of dreading how I'm gonna maneuver this thing after I've attached the long horns because you don't want to know how many times I've already accidentally smacked this shit into doors, walls etc when turning/moving it while walking. xD
 |
| Eye area sprayed. The seam didn't transition as neatly as I hoped... |
Once I had sprayed the first coat of silver paint I noticed how the
worbla's seams above the ridge were a bit too noticeable. I asked
stepdad if we had anything I could use to soften the transition and the
options were silicone or acrylic sealant. I went with acrylic sealant because at least it was the safer choice when it came to painting it and it could be sanded as well.
 |
| Acrylic sealant added. |
I dipped a finger in water and used it to slick over the acrylic and shape it how I wanted it to be. It has a long drying time so I did this before going to sleep and so it could dry over the night.
The following day it had cured and I sprayed it silver. It's not perfect but with the acrylic it looks better than without it. The acrylic stays a bit elastic even when dry and so I just pressed it down with my fingers to flatten it down and press the seams as minimal as I could.
On the next day (17th October) I started the detail painting, which meant painting with brushes by hand. I had bought a rustic red paint earlier but decided to try do the shadowing effects first with black paint – which in hindsight was a bad idea. The thing is that we had no normal black paint at home, only spray paint. I knew that for weathering and dry-brushing effects I would need ordinary paint but still decided to try with spray paint. I used a plastic bowl and sprayed a lot of spray paint in it, until I had enough for it to create a thin liquid, which I then quickly wiped off with a cloth. Just as I feared the spray paint was too intense in pigment and dried way too fast for me to be able to get the desired effect. I gave up on the shadowing/weathering for now and began the rust color painting episode instead.
 |
| Started hand-painting the rust red details Unsuccessful black spray paint experimenting visible. |
While painting I realized it would be hard as piss to get it symmetrical and so I just decided to free-hand the details instead and hope for the best; I kept my MH4U game open as a reference, even though I had to change or leave out some details because of how different my Horn is shaped when compared to the in-game model.
I used different painting techniques to get different effects and varying color intensity, although I will need to add more depth and shadows to the red with black paint later. It's a bit too flat right now and, to be honest, I'm not happy with the color because it's a bit too bright (it's more vibrant in real life than on photos) and I expected a more dull and brownish red, like shown on the lid...
 |
| Painting in progress. |
I of course always had to paint one side first, wait for it to dry, rotate it carefully and then paint the next side. Rinse and repeat.
 |
| Painting the backside... |
I must admit that I'm not happy with how the body's "crosses" lined up on the backside. I knew that things would mess up considering how I can never see the whole Horn from all angles at once and thus I have to improvise as I go on, rotating it while I progress and then, if I notice that something's off or doesn't line up at the end when I meet up again at the starting spot, it's already way too late to do anything to try to fix what went wrong. So yeah, this thing hasn't even seen symmetry. xD
Once I was done painting the red, except for the head, it was time to move on to the weathering effect. I went to buy some ordinary black acrylic paint (art paint) and used a small brush and a cloth to wipe off all the excess paint, leaving only a small to moderate darkening effect as I went on. This was time-consuming and annoying at times.
 |
| Weathered upper head to the (watcher's) left, untouched original color to the right. |
The point of the black paint was to darken the overall appearance (since the rust red was too bright) as well as provide a weathering effect and make the whole build have more depth.
I dipped black paint into occasional uneven spots (holes etc) and when I wiped it off the paint stayed in the crevices and gave a cool worn look.
I dipped black paint into occasional uneven spots (holes etc) and when I wiped it off the paint stayed in the crevices and gave a cool worn look.
 |
| Darkening, darkening, darkening... |
Many hours later I was done adding and wiping off black paint. The end result looks better now than without the black. I know that I could have done a better job with more color gradients and shadows etc but I don't have the time for it right now and, besides, almost all of the paints I've been using have been of different types (alkyd, acrylic, spray etc) and I don't want to try mixing different paint types while fresh because I have no idea how they would react to one another.
 |
| Black paint session complete, save for the head. |
Alternative photo of the same progress as above but seen from another angle here.
Now the only things left was to finish up the horns and ears, attach them to the head and then paint the head and eyes – sounds easy when you say it like that, but on further thought I realized that I might need to change my plans a bit when it comes to how exactly I will attach the horns as some issues showed up; I want to make sure that they'll actually stay on and not break off from smaller impacts and thus I thought that I'll end this post here and make a final, seventh part, for finishing up this thing as I suspect the horns and ears process might get a bit longer than I initially thought. So yeah, I originally totally intended for this sixth part to be the final onesorry but I think I'll just make a seventh post to avoid this one turning super long since yeah, photos quickly make a post long and there will be some explaining... xD
Now the only things left was to finish up the horns and ears, attach them to the head and then paint the head and eyes – sounds easy when you say it like that, but on further thought I realized that I might need to change my plans a bit when it comes to how exactly I will attach the horns as some issues showed up; I want to make sure that they'll actually stay on and not break off from smaller impacts and thus I thought that I'll end this post here and make a final, seventh part, for finishing up this thing as I suspect the horns and ears process might get a bit longer than I initially thought. So yeah, I originally totally intended for this sixth part to be the final one
Thanks for following my progress on this MonHun prop and keep your eyes peeled for the final part!
No comments:
Post a Comment
Consider dropping me a comment if you enjoyed this post. (´∀`○)
Maybe you got inspired, learned something new or you have some other things you want to tell me? Don't hesitate if you have something to say – I'd love to hear from you!